OSS のオンライン会議システム「BigBlueButton」を試す
OSS を使って、リモートで作業できないかと探していたところ、
BigBuleButton というものがあるということで試しにインストールしてみました。
似たようなものとして、Apache OpenMeetings(※1)というものもあるようですが、
ユーザビリティが悪そうだったので、
今回はBigBuleButtonを採用しました。
※ 1 Apache OpenMeetings
http://openmeetings.apache.org/index.html
スペック要件
公式サイトによると、以下のスペックが求められています。
- Ubuntu 14.04 64-bit のサーバ
- 4GB のメモリ、およびswap 領域 (8GB推奨)
- Quad-core 2.6 GHZ CPU (またはそれ以上)
- TCPポート 80番、1935番、9123番の解放
- UDPポート 16384〜32768番の解放
- 80番ポートが他のアプリケーションで使用されていないこと
- 書き込み可能な500GB以上のディスク空き領域があること
- 双方向帯域幅 100 Mbits/sec
- ベアメタル(仮想マシン以外)
検証環境
Ubuntu 14.04.3 LT (x86_64) (Ubuntu Server 14.04 LTS (HVM), SSD Volume Type)
AWS EC2
- m4.large (2vCPU、8GB RAM)
インストール手順
インストール方法は、こちらの公式手順書を参考にしています。
http://docs.bigbluebutton.org/install/install.html
準備
ロケールを以下のとおり変更します。
ロケールを変更?と思いましたが、小心者なので、素直にしたがいました。
$ sudo vi /etc/default/locale
LANG="en_US.UTF-8"
パッケージのダウンロード元設定ファイルの初期状態を確認します。
$ grep "multiverse" /etc/apt/sources.list
## multiverse WILL NOT receive any review or updates from the Ubuntu
# deb http://ap-northeast-1.ec2.archive.ubuntu.com/ubuntu/ trusty multiverse
# deb-src http://ap-northeast-1.ec2.archive.ubuntu.com/ubuntu/ trusty multiverse
# deb http://ap-northeast-1.ec2.archive.ubuntu.com/ubuntu/ trusty-updates multiverse
# deb-src http://ap-northeast-1.ec2.archive.ubuntu.com/ubuntu/ trusty-updates multiverse
# deb http://ap-northeast-1.ec2.archive.ubuntu.com/ubuntu/ trusty-backports main restricted universe multiverse
# deb-src http://ap-northeast-1.ec2.archive.ubuntu.com/ubuntu/ trusty-backports main restricted universe multiverse
# deb http://security.ubuntu.com/ubuntu trusty-security multiverse
# deb-src http://security.ubuntu.com/ubuntu trusty-security multiverse
以下の通りコマンドを実行し、リストに追加します。
$ echo "deb http://us.archive.ubuntu.com/ubuntu/ trusty multiverse" | sudo tee -a /etc/apt/sources.list
deb http://us.archive.ubuntu.com/ubuntu/ trusty multiverse
リストにdeb http://us.archive.ubuntu.com/ubuntu/ trusty multiverseという行が追加されたことを確認します。
$ grep "multiverse" /etc/apt/sources.list
## multiverse WILL NOT receive any review or updates from the Ubuntu
# deb http://ap-northeast-1.ec2.archive.ubuntu.com/ubuntu/ trusty multiverse
# deb-src http://ap-northeast-1.ec2.archive.ubuntu.com/ubuntu/ trusty multiverse
# deb http://ap-northeast-1.ec2.archive.ubuntu.com/ubuntu/ trusty-updates multiverse
# deb-src http://ap-northeast-1.ec2.archive.ubuntu.com/ubuntu/ trusty-updates multiverse
# deb http://ap-northeast-1.ec2.archive.ubuntu.com/ubuntu/ trusty-backports main restricted universe multiverse
# deb-src http://ap-northeast-1.ec2.archive.ubuntu.com/ubuntu/ trusty-backports main restricted universe multiverse
# deb http://security.ubuntu.com/ubuntu trusty-security multiverse
# deb-src http://security.ubuntu.com/ubuntu trusty-security multiverse
deb http://us.archive.ubuntu.com/ubuntu/ trusty multiverse
パッケージを更新します。
$ sudo apt-get update

$ sudo apt-get dist-upgrade
libreoffice セットアップ
Ubuntu 14.04 デフォルトの libreoffice 4.2.x ではなく、4.4を使用するとのことで、 libreoffice 4.4 インストールできるようにリポジトリを追加します。
$ sudo apt-get install software-properties-common
$ sudo add-apt-repository ppa:libreoffice/libreoffice-4-4
BigBlueButton セットアップ
BigBlueButton パッケージのリポジトリにアクセスできるよう、キーをインストールします。
$ wget http://ubuntu.bigbluebutton.org/bigbluebutton.asc -O- | sudo apt-key add -
BigBuleButton リポジトリを追加し、更新します。
$ echo "deb http://ubuntu.bigbluebutton.org/trusty-090/ bigbluebutton-trusty main" | sudo tee /etc/apt/sources.list.d/bigbluebutton.listdeb http://ubuntu.bigbluebutton.org/trusty-090/ bigbluebutton-trusty main

$ sudo apt-get update
ffmpeg インストール
メディアファイル(音声、動画、デスクトップ共有)を使用するため、ffmpeg をインストールします。
インストールするためのスクリプトを作成します。
$ vi install-ffmpeg.sh

$ cat install-ffmpeg.sh
sudo apt-get install build-essential git-core checkinstall yasm texi2html libvorbis-dev libx11-dev libvpx-dev libxfixes-dev zlib1g-dev pkg-config netcat libncurses5-dev

FFMPEG_VERSION=2.3.3

cd /usr/local/src
if [ ! -d "/usr/local/src/ffmpeg-${FFMPEG_VERSION}" ]; then
  sudo wget "http://ffmpeg.org/releases/ffmpeg-${FFMPEG_VERSION}.tar.bz2"
  sudo tar -xjf "ffmpeg-${FFMPEG_VERSION}.tar.bz2"
fi

cd "ffmpeg-${FFMPEG_VERSION}"
sudo ./configure --enable-version3 --enable-postproc --enable-libvorbis --enable-libvpx
sudo make
sudo checkinstall --pkgname=ffmpeg --pkgversion="5:${FFMPEG_VERSION}" --backup=no --deldoc=yes --default
先ほど作成したスクリプトを実行して、ffmpeg をインストールします。
$ chmod +x install-ffmpeg.sh
$ ./install-ffmpeg.sh
インストール後に ffmpeg バージョンが表示されるか確認します。
$ ffmpeg -version
ffmpeg version 2.3.3 Copyright (c) 2000-2014 the FFmpeg developers
built on Aug 21 2015 23:11:44 with gcc 4.8 (Ubuntu 4.8.4-2ubuntu1~14.04)
configuration: --enable-version3 --enable-postproc --enable-libvorbis --enable-libvpx
libavutil      52. 92.100 / 52. 92.100
libavcodec     55. 69.100 / 55. 69.100
libavformat    55. 48.100 / 55. 48.100
libavdevice    55. 13.102 / 55. 13.102
libavfilter     4. 11.100 /  4. 11.100
libswscale      2.  6.100 /  2.  6.100
libswresample   0. 19.100 /  0. 19.100
BigBlueButton インストール
BigBlueButton パッケージをインストールします。
$ sudo apt-get install bigbluebutton
BigBlueButton デモパッケージのインストール
BigBlueButton のデモをインストールします。 今回は、使ってみるのが目的なので、インストールしました。
$ sudo apt-get install bbb-demo
BigBlueButton チェックパッケージのインストール
config等をチェックするツールでしょうか。 インストールしておきます。
$ sudo apt-get install bbb-check
WebRTC audio の有効化
必要であれば、ということですが、こちらもインストールしておきます。
$ sudo bbb-conf --enablewebrtc
セットアップ
config の初期化とセットアッップ、およびサービスの再起動を行います。
$ sudo bbb-conf --clean

$ sudo bbb-conf --check

BigBlueButton Server 0.9.1 (396)
                    Kernel version: 3.13.0-48-generic
                      Distribution: Ubuntu 14.04.3 LTS (64-bit)
                            Memory: 16047 MB

/var/www/bigbluebutton/client/conf/config.xml (bbb-client)
        Port test (tunnel): 172.31.8.229
                              Red5: 172.31.8.229
              useWebrtcIfAvailable: true

/opt/freeswitch/conf/sip_profiles/external.xml (FreeSWITCH)
                    websocket port: 5066
                    WebRTC enabled: true

/etc/nginx/sites-available/bigbluebutton (nginx)
                       server name: 172.31.8.229
                              port: 80
                    bbb-client dir: /var/www/bigbluebutton

/var/lib/tomcat7/webapps/bigbluebutton/WEB-INF/classes/bigbluebutton.properties (bbb-web)
                      bbb-web host: 172.31.8.229

/var/lib/tomcat7/webapps/demo/bbb_api_conf.jsp (API demos)
                           api url: 172.31.8.229

/var/www/bigbluebutton/check/conf/config.xml (client check)
                      client check: 172.31.8.229

/usr/share/red5/webapps/bigbluebutton/WEB-INF/red5-web.xml (red5)
                  voice conference: FreeSWITCH
                     capture video: true
                   capture desktop: true

/usr/local/bigbluebutton/core/scripts/bigbluebutton.yml (record and playback)
                     playback host: 172.31.8.229


** Potential problems described below **
# Warning: The API demos are installed and accessible from:
#
#    http://172.31.8.229/
#
# These API demos allow anyone to access your server without authentication
# to create/manage meetings and recordings. They are for testing purposes only.
# If you are running a production system, remove them by running:
#
#    sudo apt-get purge bbb-demo

# Warning: The client self check is installed and accessible from:
#
#    http://172.31.8.229/check
#
Webブラウザより、http://<サーバIP>にアクセスし、
BigBlueButton のトップページが表示されない場合、以下の通りIPアドレスをセットします。
$ sudo bbb-conf --setip <サーバIP>
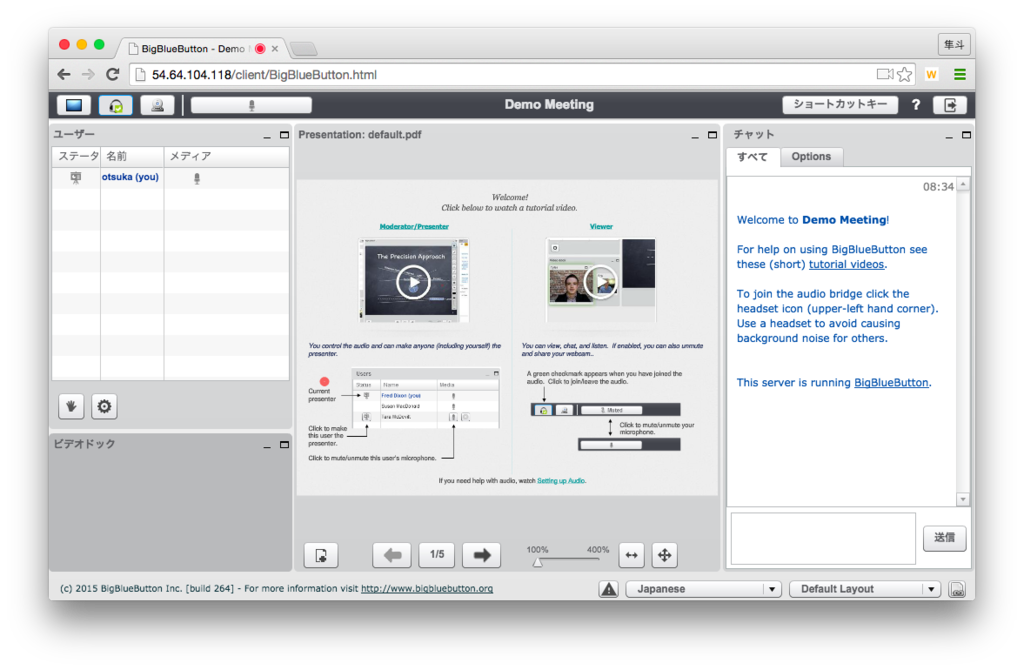
以下の通り、ログイン画面が表示されれば、OKです。


当初、Chrome で検証してましたが、 Webカメラとデスクトップ共有がうまく機能しなかった。
どうやら Firefox 推奨らしい.. Firefox を使うと正常に起動できた。
所感
作り込めば、e-leaning システムとか作れそうだけど、 ソースコードを見る限り やるならちょっと本腰入れて開発する必要がありそう..